Connecting & Managing Displays (Browsers)
Each screen or browser that will show Kioskmanager content needs to be recognized by the system. This allows you to assign specific content playlists to it.
How New Displays Connect
Display registration is an automatic process:
- Access the Player URL: On the device intended as a display (e.g., a kiosk, smart TV browser, or a computer's web browser), navigate to the Kioskmanager player URL. This is typically the main address of your Kioskmanager instance (e.g.,
http://kiosk.yourdomain.com/orhttp://kiosk.yourdomain.com/play/). - Automatic Registration: Upon first visit, the browser generates a unique identifier (UUID) for itself and communicates this to the Kioskmanager server. The server automatically creates a new "Browser" record using this UUID.
- Initial State: Initially, this newly registered browser will not be assigned to any Display Group and will likely show default content or a "no content assigned" message, depending on the player's configuration.
Finding and Identifying New Displays
As an administrator, you'll need to find these automatically registered browsers in the admin panel to manage them.
- Log in: Access the Kioskmanager Admin Panel.
- Click on Browsers
- Locate the New Browser: You will see a list of all registered browsers.
- Look for entries with a long, unique Identifier (UUID format, e.g.,
a1b2c3d4-e5f6-7890-1234-567890abcdef). - The "Name" field will likely be empty for new, unconfigured browsers.
- The "Last seen" timestamp can help identify recently connected displays.
- Tip: Your player page briefly shows the Browser ID on connection (status overlay), you can use that to match.
- Look for entries with a long, unique Identifier (UUID format, e.g.,
Naming and Configuring a Display
Once identified, you should give the display a human-readable name and assign it to a Display Group. 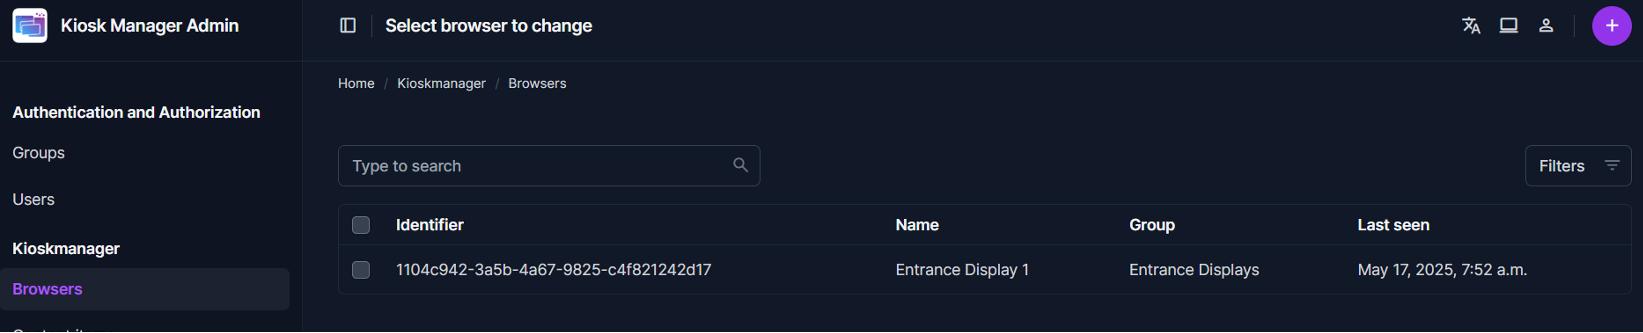
- Select the Browser: Click on the UUID (Identifier) of the browser you wish to configure from the list. This will take you to the "Change browser" page.
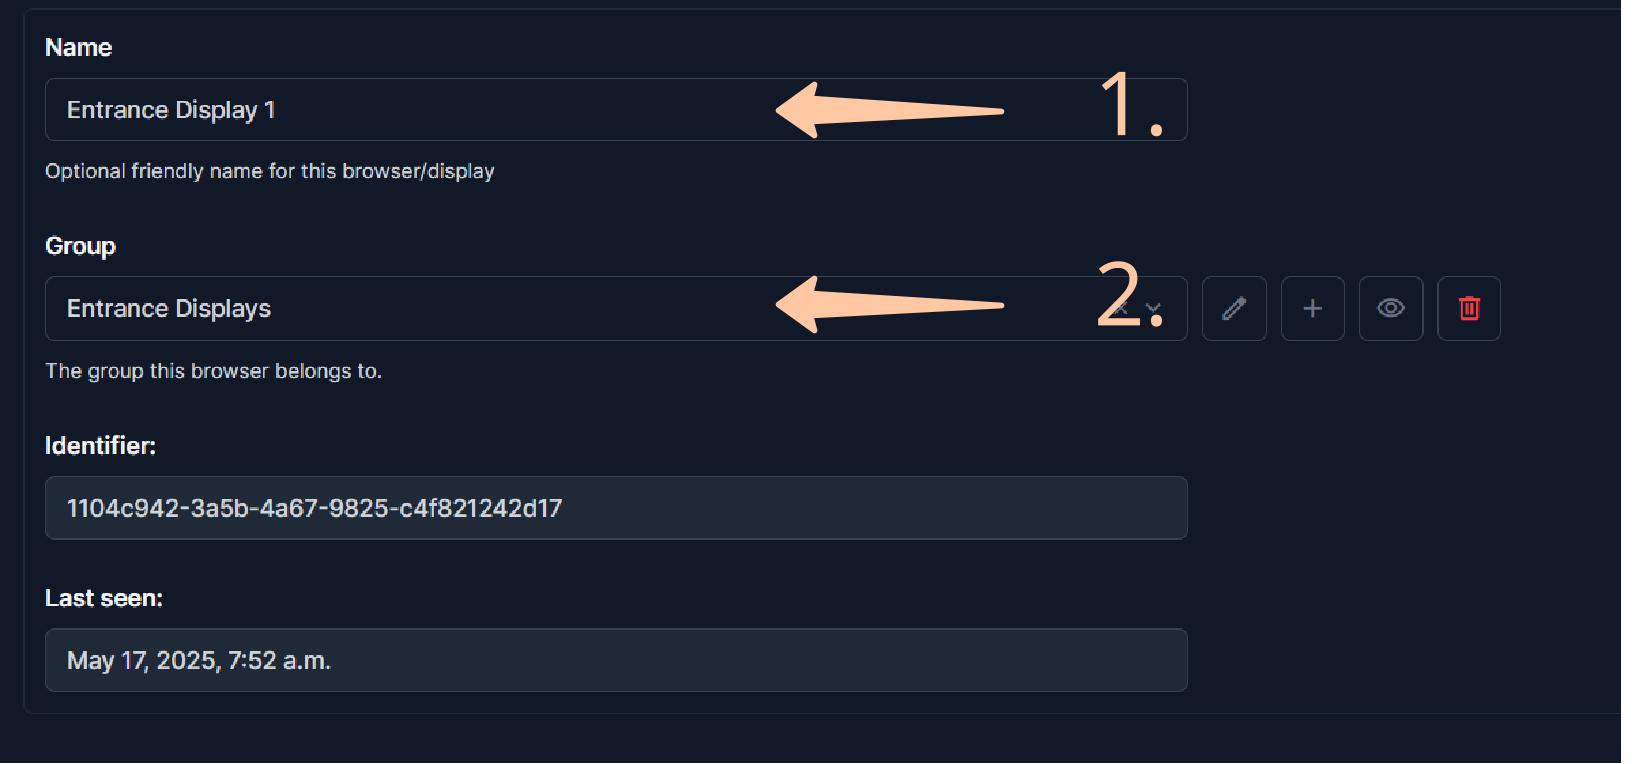
- Assign a Name (1): In the "Name" field, enter a descriptive name that helps you identify this specific display (e.g., "Lobby Main Screen", "Meeting Room A Display", "Floor 2 - West Wing Kiosk").
- Assign to a Group (2):
- Locate the "Group" field. For new displays, it will likely show
---------(meaning no group is assigned). - Click the dropdown menu or the magnifying glass icon. A pop-up or list will appear showing available Display Groups.
- Select the desired Display Group. (If you need to create a new group, you'll do that under the "Display groups" section first – see the Create display groups guide for details on creating groups, though admins can also do this).
- Locate the "Group" field. For new displays, it will likely show
- Save Changes: Scroll to the bottom of the page and click "Save".
The display device, upon its next communication with the server (usually within a few seconds or at the start of the next content loop), will pick up its new name (for logging/identification on the server) and start playing the content assigned to its new Display Group.# Connecting & Managing Displays (Browsers)
Each screen or browser that will show Kioskmanager content needs to be recognized by the system. This allows you to assign specific content playlists to it.
Allow Content Managers to assign content to Display groups
You need to assign users to display groups to allow them to assign content to them.
- Select Display group: Go to
Display groupsand select the one you want to assign a user to.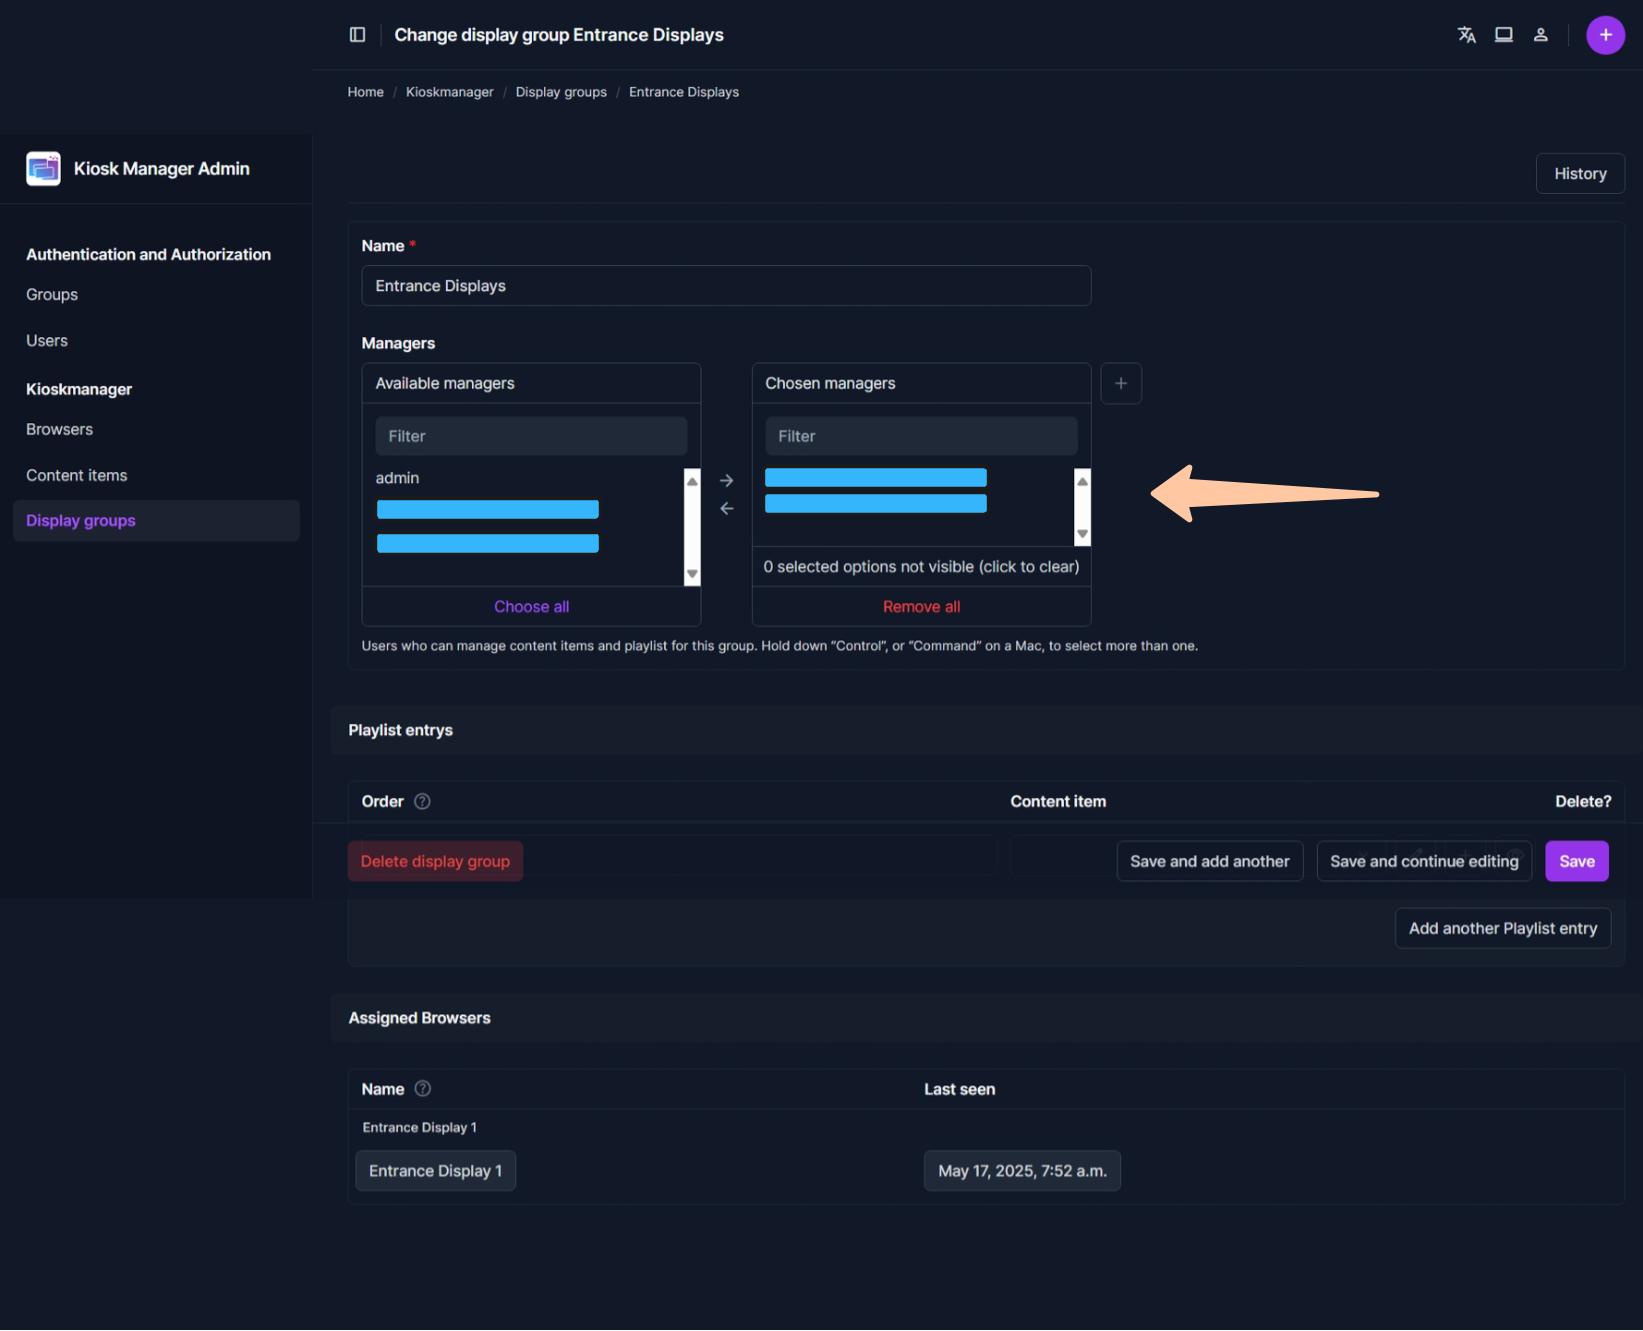
- Select content managers: Add all users which should be able to assign content to that display group using the arrow buttons.